
Here is a guided how-to for updating the screen at your terminal in RiseVision. The easiest way to display information is to build slides in PowerPoint and then import them into RiseVision. To do that, you will need to make a powerpoint presentation and make sure each slide is exactly how you want it to be displayed. After you have built your powerpoint you will need to go to:
File -> Save As -> Choose the Folder where you want to save it -> and then Save as Type JPG
1. When you click on a folder on the Save As page (A), a new window will appear (B) that will let you change the file name and file type.
2. Click Save as Type (C) in the Save As window to view the dropdown list and change the file type from PowerPoint Presentation to JPEG.
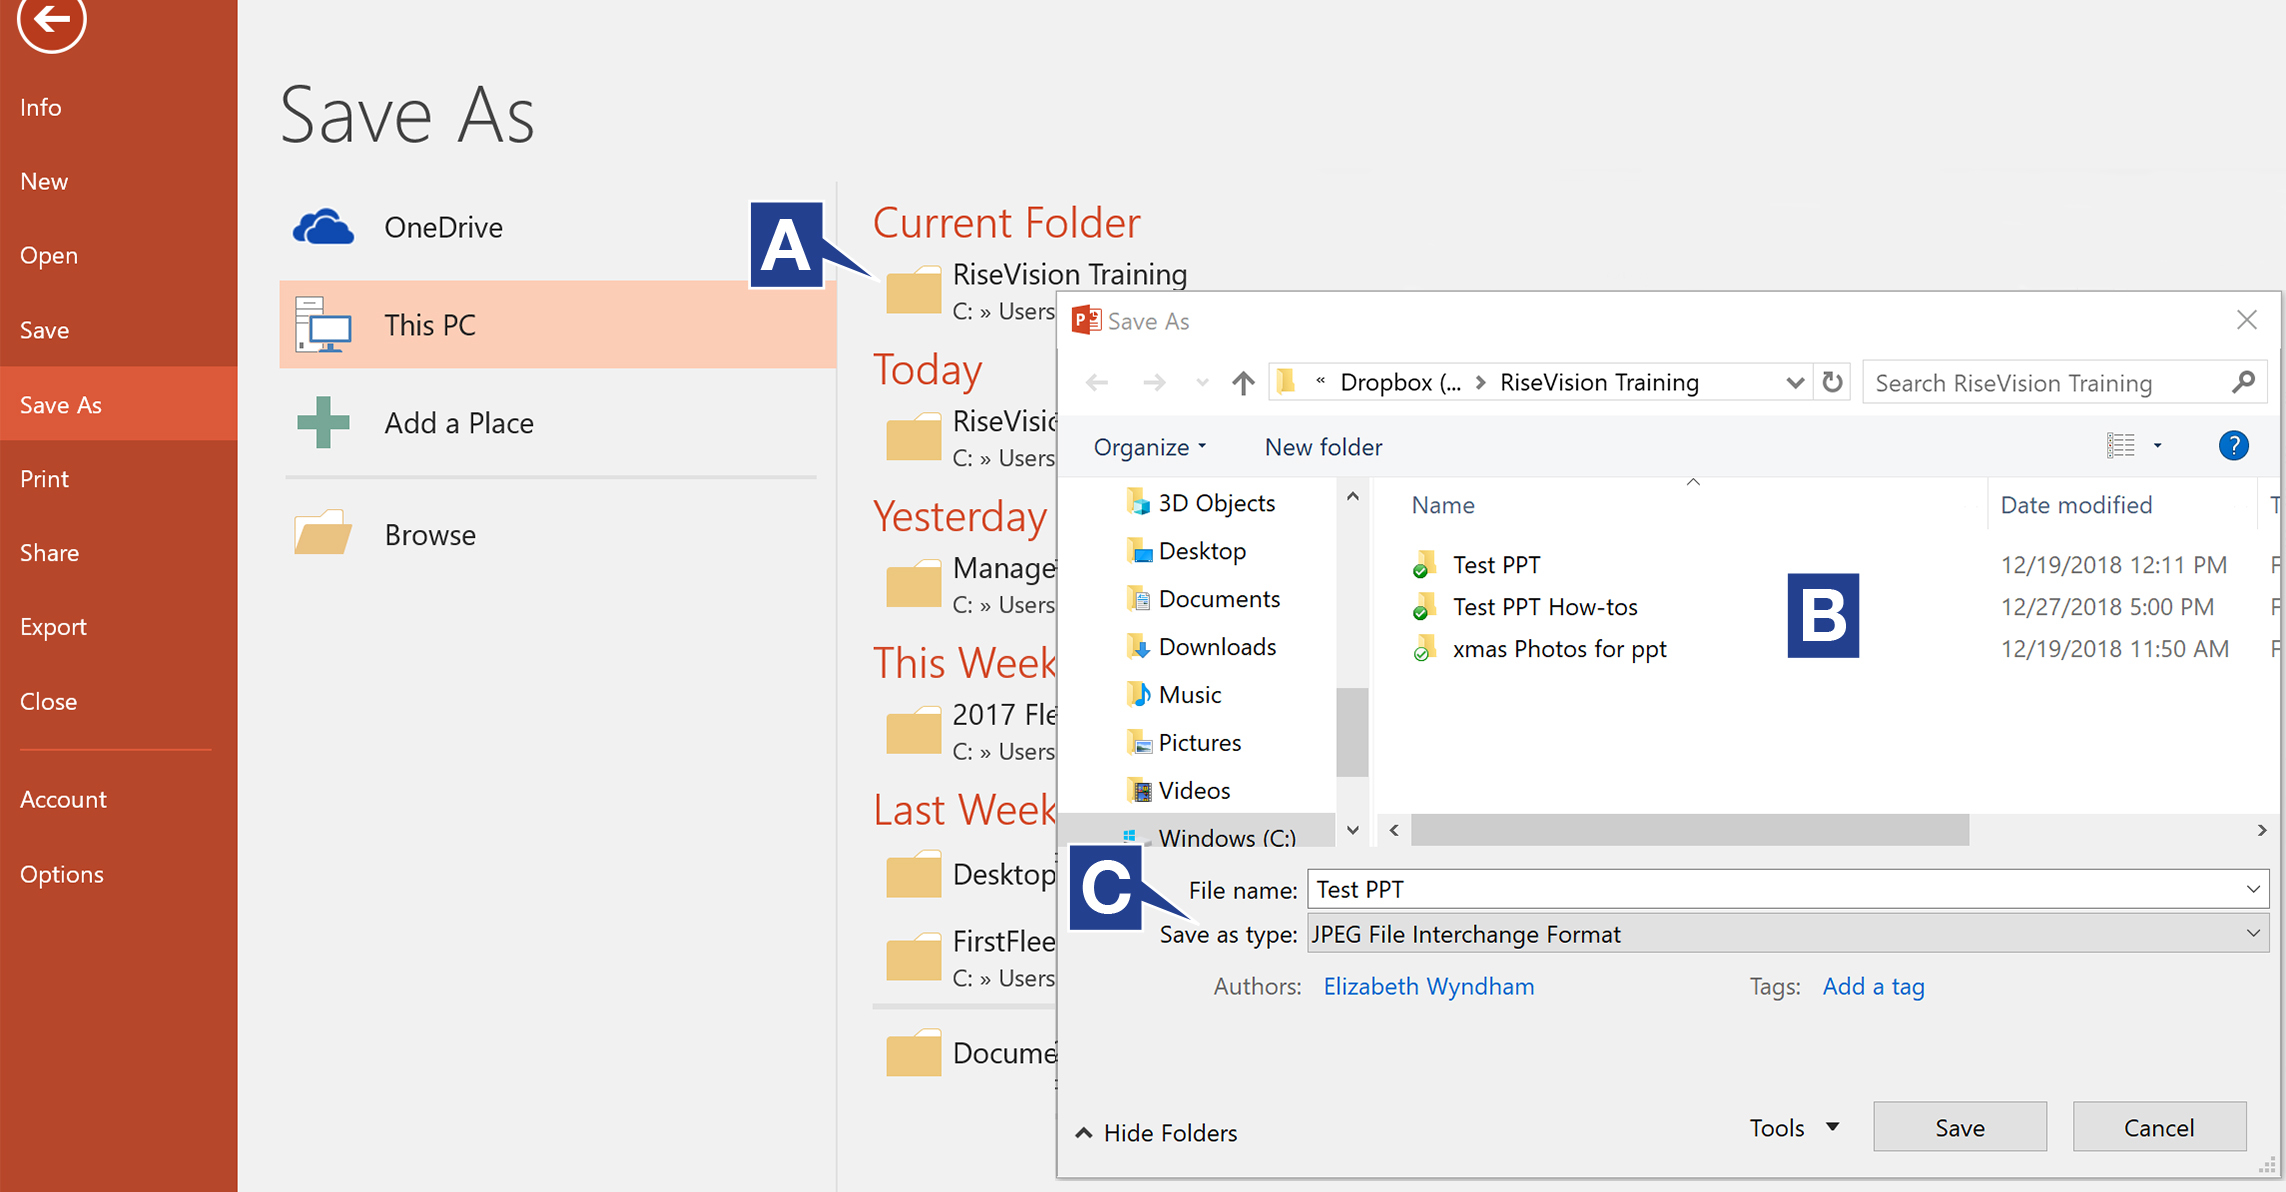
3. You will be asked which slides do you want to export and you will need to click All Slides.
Each slide you created in the powerpoint will now be saved as individual .jpg images in the selected folder. Now we need to rename the files for easy identification and then import all of these images into RiseVision so that we can use them in our presentation. To do that, we need to:
4. Login to RiseVision.com.
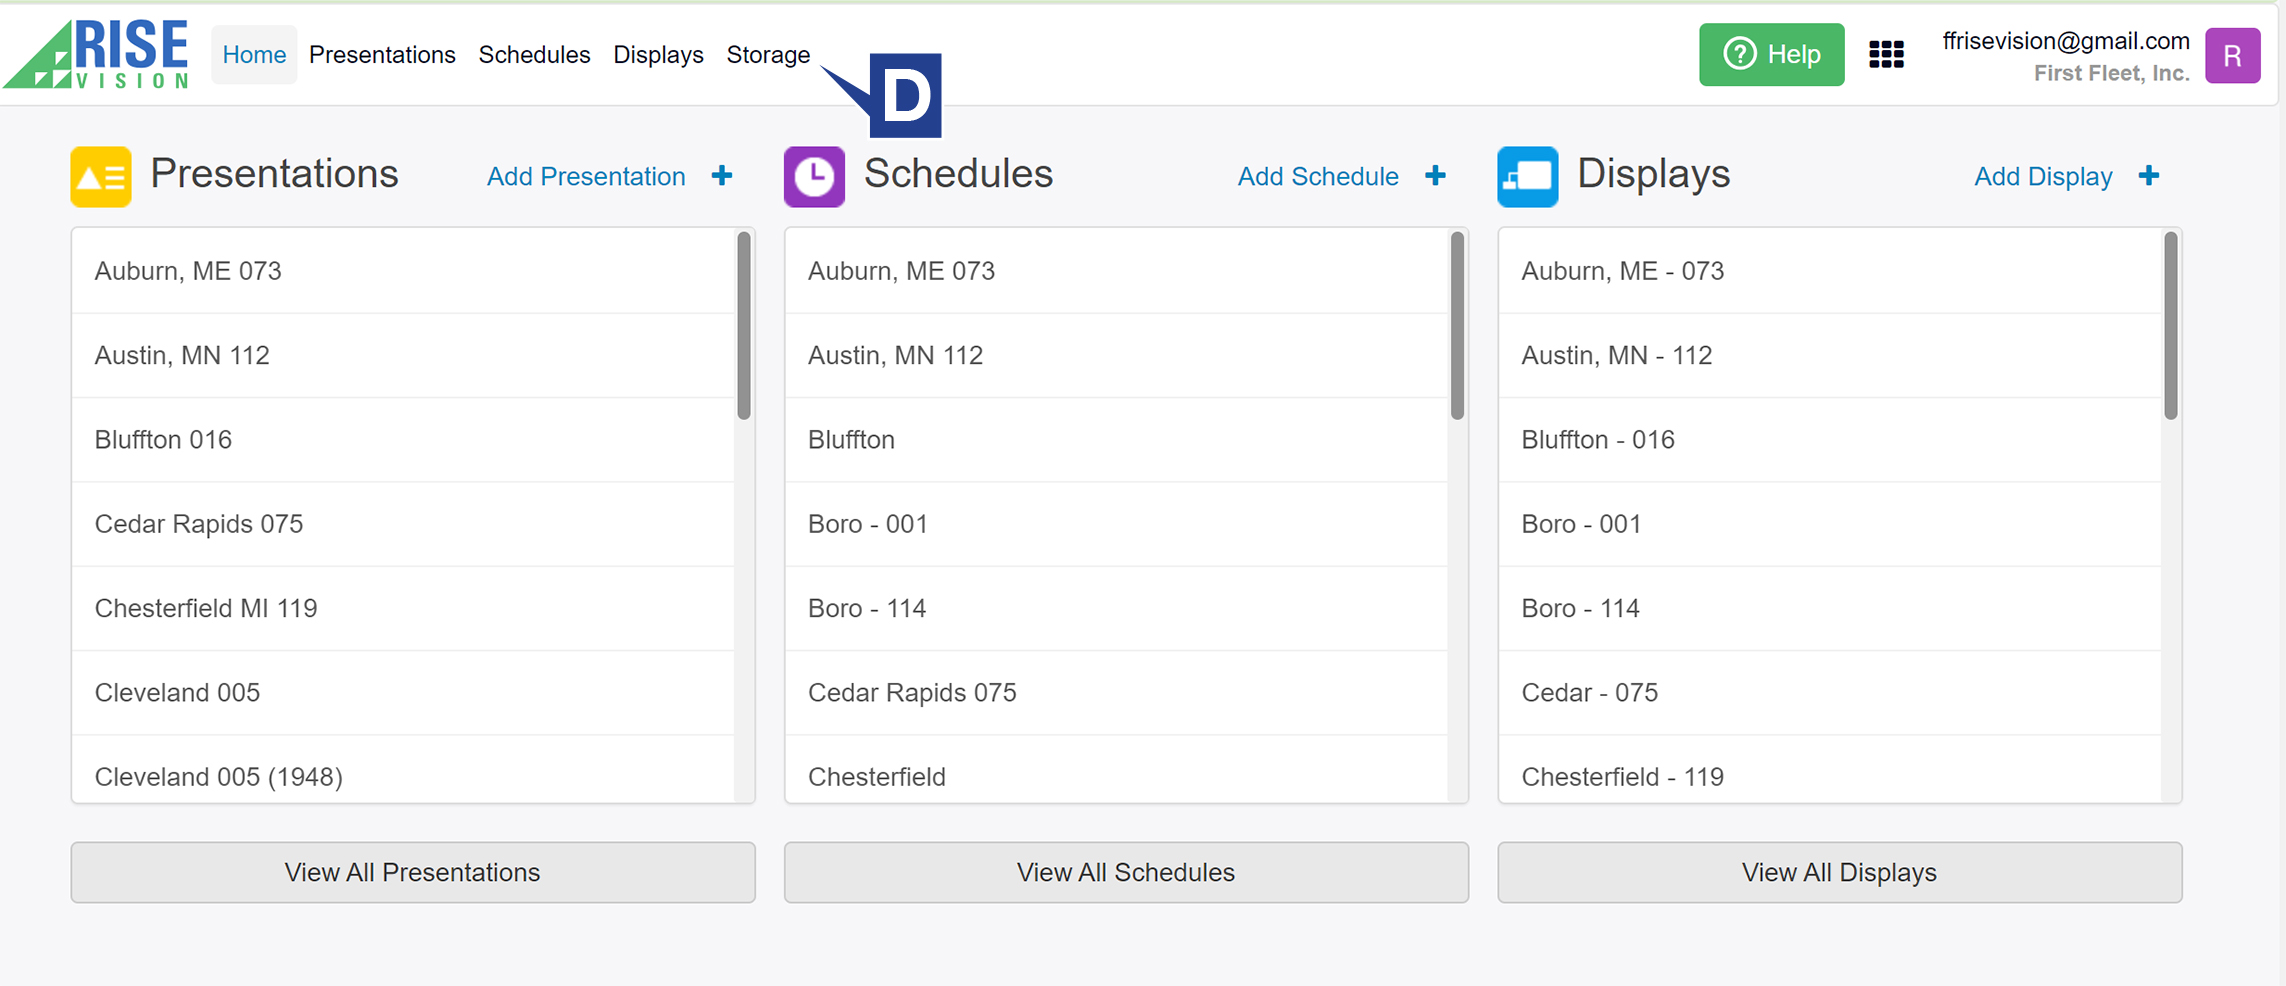
5. Click on storage (D) in the top menu.
6. Then click Upload Folder (E) in the top right.
7. A browser window will appear for you to select your file.
8. Then click Upload. (F)

After you have uploaded your images into a folder, then you can add them to your presentation.
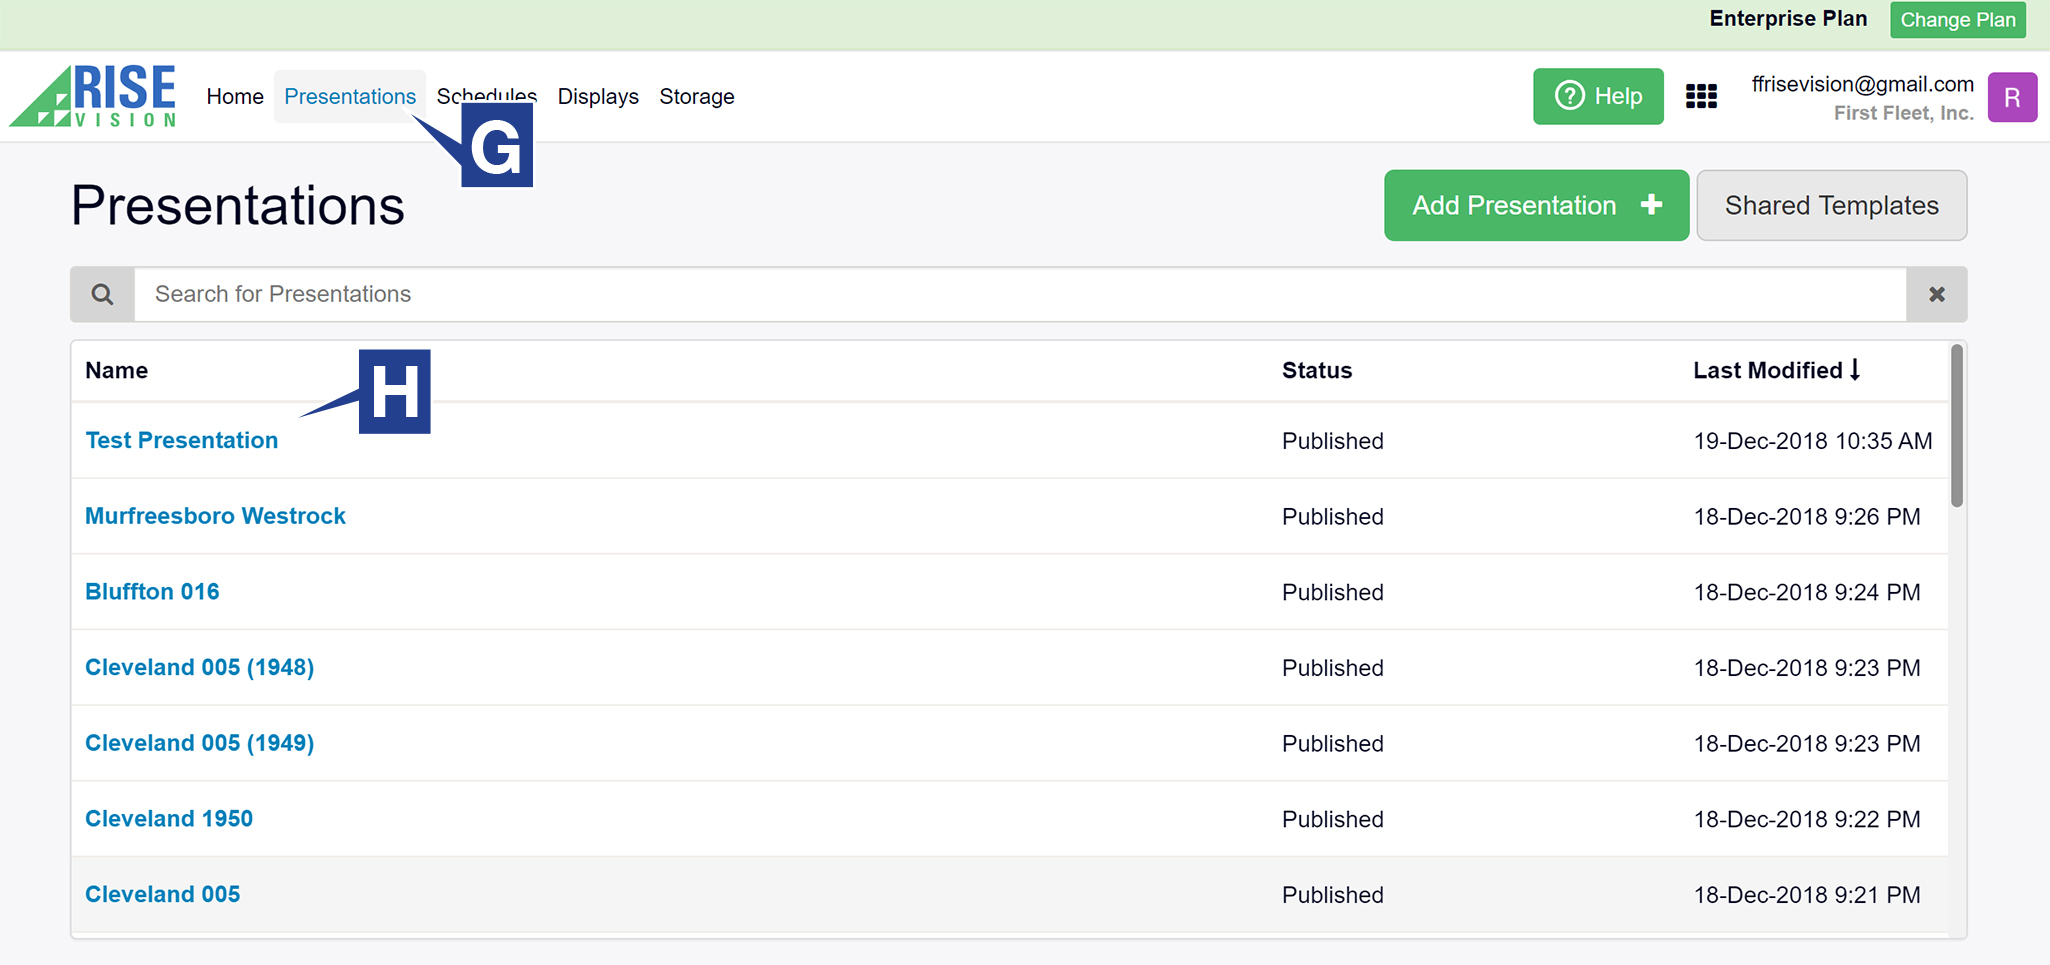
9. Go to the top menu and click presentation. (G)
10. Select the presentation (H) for your terminal that is already preset with a few standard slides.
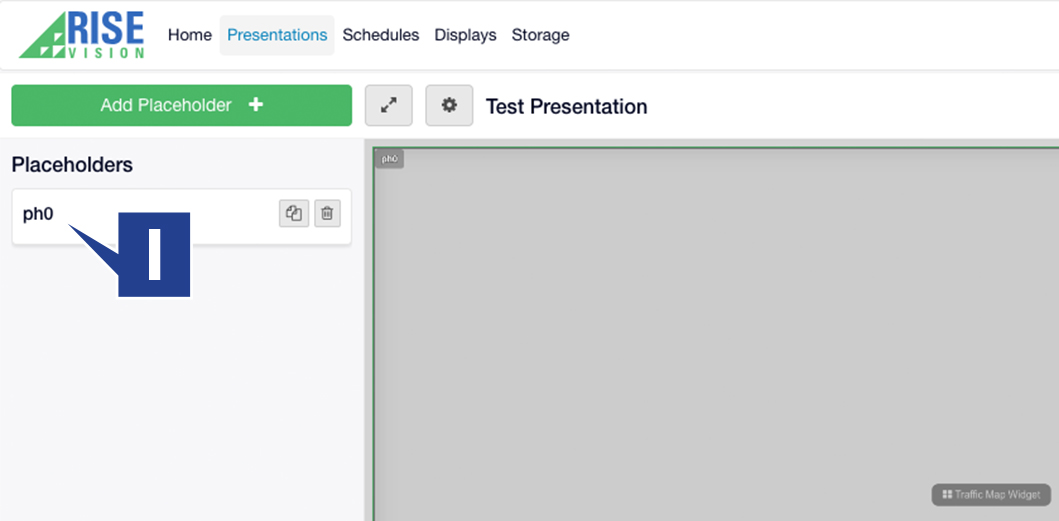
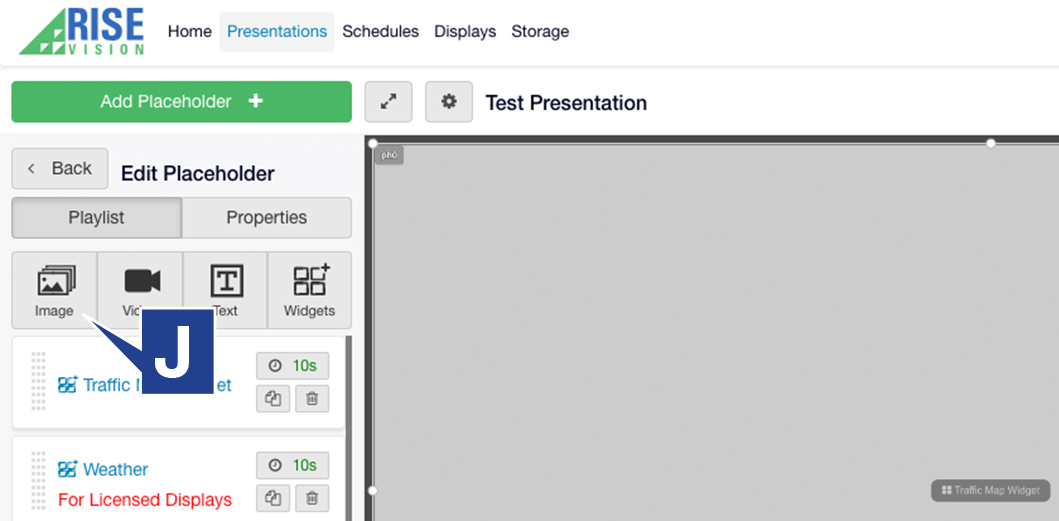
11. After your presentation opens, click the Placeholder (I) at the top. A Placeholder is essentially a presentation within a presentation. We are going to put all of our slides into this one pre-made placeholder.
12. To add our new slides, all you have to do is click Image (J) on the left tool bar.
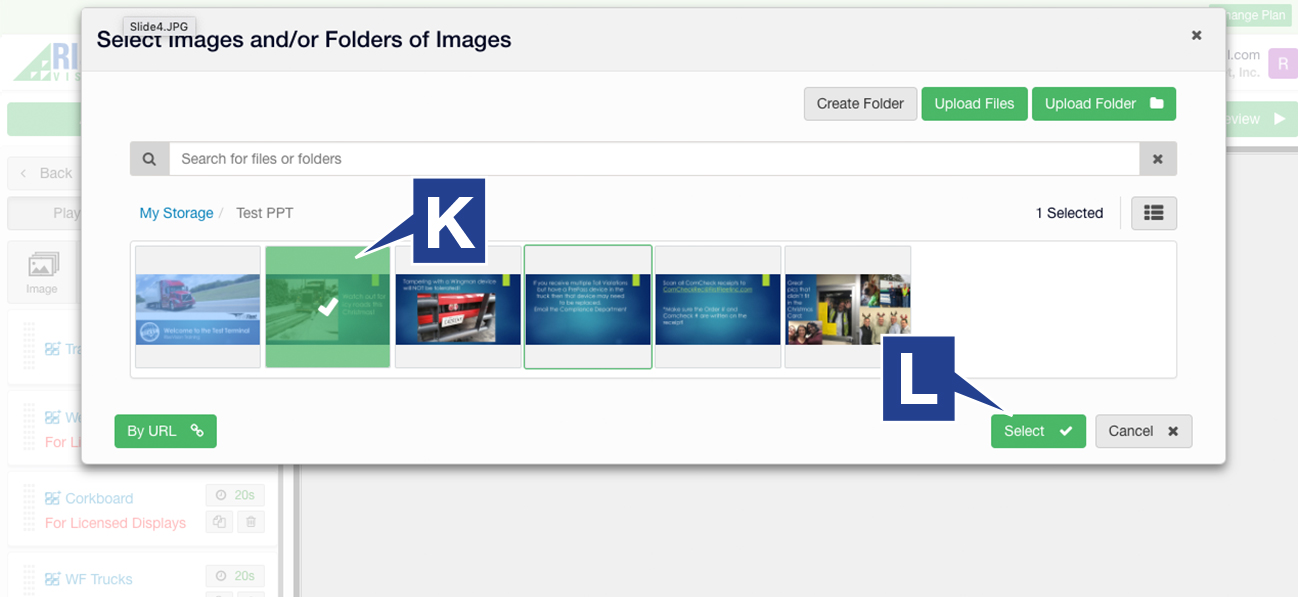
13. When the storage window opens, double click on the folder that we uploaded in steps 5-8. Click on an image (K) and then click the green select button (L).
14. Now we need to make sure this slide will show up on our screen, so scroll down to the bottom to find the slide we just uploaded and click on the timer box (M) that currently reads 10s.
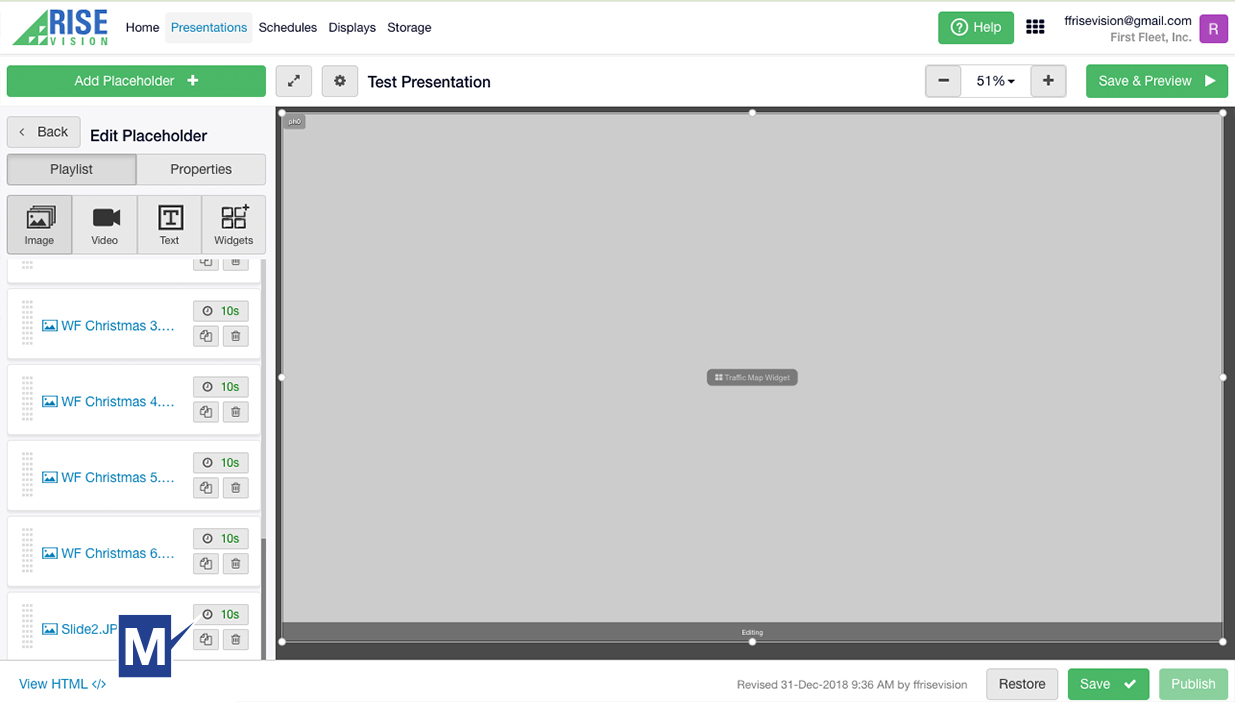
15. You can adjust the duration that the slide stays on the screen (10-20sec is recommended for a simple slide with minimal words)
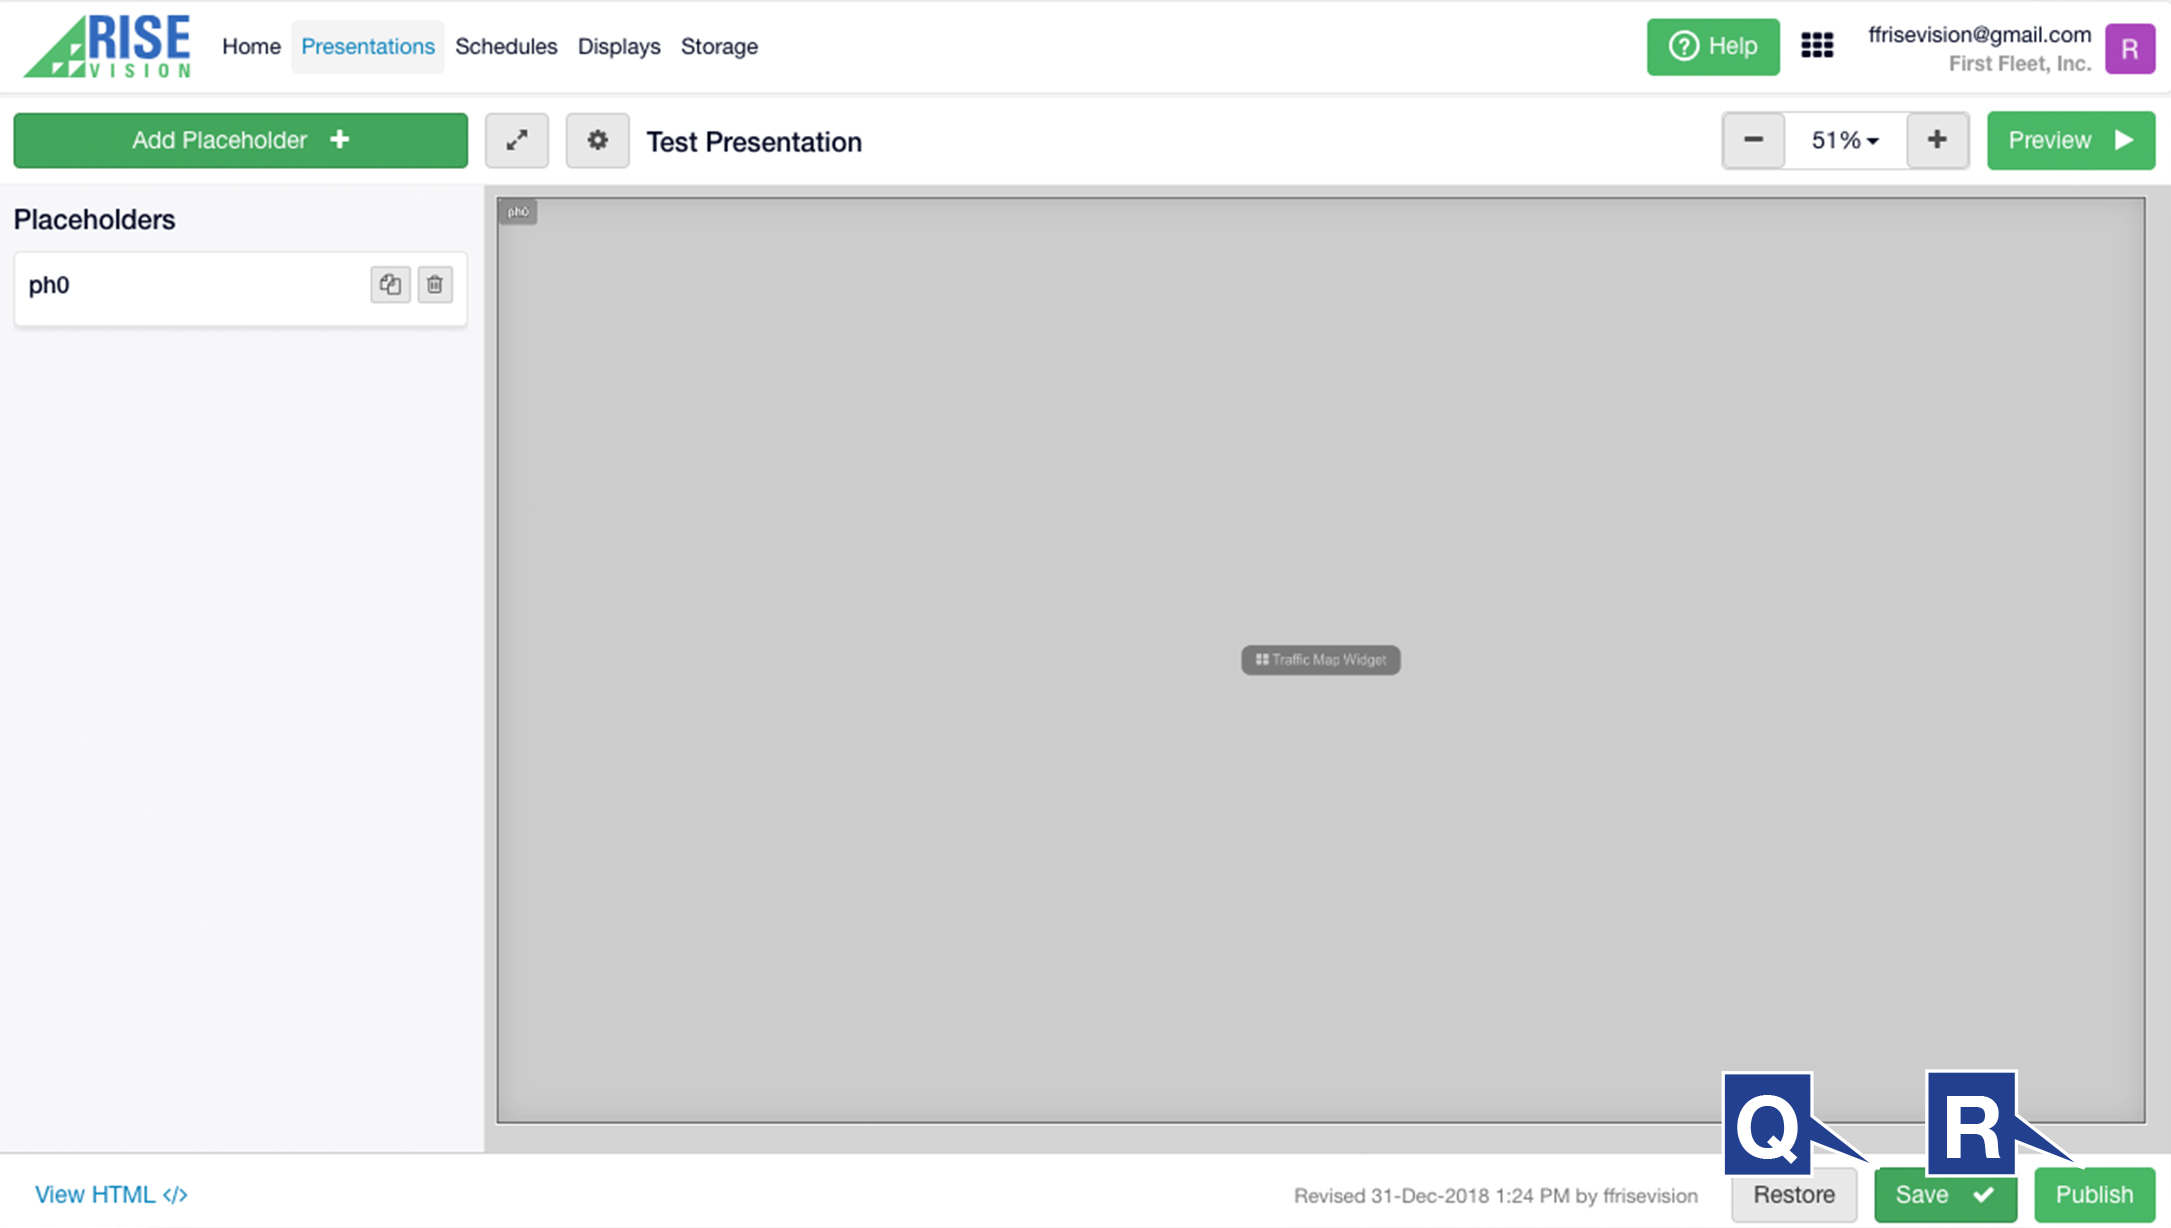
16. Finally, all you need to do is click Save (Q) and then click Publish (R) and your presentation will be sent to your screen.
If you have any trouble with your RiseVision Presentation, please email support@firstfleetinc.com for assistance.
Comments
Please sign in to leave a comment.